July 1, 2022
I've enjoyed making these Butterfly Finger Picks the last 10 years for everyone (2012 to 2022). Thank you very much for your great support!
I am no longer making and selling these picks. I've become too busy with other projects. Nobody on eBay or Amazon or anywhere else is making these picks, or is authorized to represent these picks, even if they have copied photos and verbiage from this website.
If anybody in the future becomes authorized to make and sell and represent these picks, I will list a link to them here.
The only way to get these picks right now is to make your own, or maybe find a willing person to make them for you.
I have put instructions below for how to make these Butterfly Finger Picks at home that are easy to follow and require only simple tools that can be purchased locally or online.
If you are interested in making and selling these picks for others, let me know. I can produce faster production instructions for you that require more setup.
Materials Needed
Drumstick Preparation
Sizing Guide
Normal Size Finger Pick
Small Size Finger Pick
Normal Size Thumb Pick
Small Size Thumb Pick
Materials Needed:
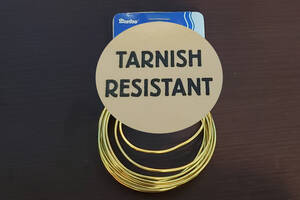
1. Small roll of about 1.3mm diameter (or 16 AWG - American Wire Gauge) tarnish resistant copper (or brass) craft wire in any color. (craftstore, online)
Tarnish resistant is important to help the picks last without becoming discolored.
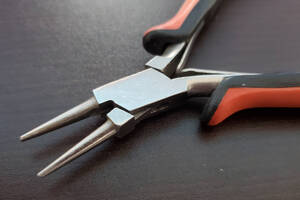
2. Small round needle nose pliers. (craftstore, online)
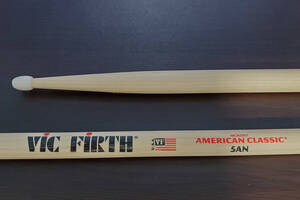
3. 5A sized drumstick. (music store, online)
4. Millimeter ruler.
5. Cylinder surface at least 20mm tall and about 35mm in diameter.
(pill bottle, or tube cap from lotion, soap, or food, etc.)
6. Marker to mark wire and wood with.
(Rubbing alchohol should remove the marks afterwards.)
7. Something to cut wire with.
8. Something to smooth metal wire ends with.
(wet/dry sandpaper, diamond nail file, etc.)
9. Hammer.
10. Large coin.
11. Empty end of a narrow ink tube from a pen.
12. Flat table to work on.
13. For normal thumb pick: 3"x5" (75mm x 127mm) index card cut in half length wise, and thin tape.
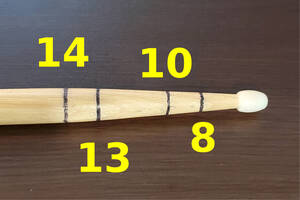
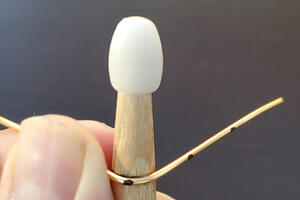
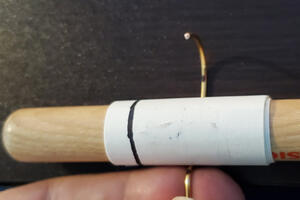
Drumstick Preparation (for both normal and small size finger picks):
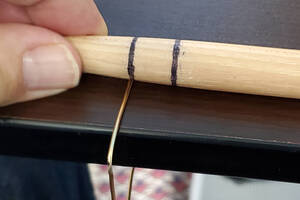
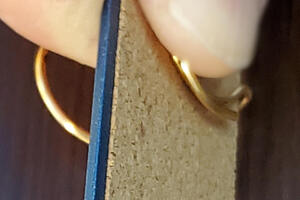
1. Roll the drumstick on the table to mark a black ring where the tapered tip of the drumstick is 8mm in diameter.
2. Roll the drumstick on the table to mark a black ring where the tapered tip of the drumstick is 10mm in diameter. The black ring in the photo below is actually 9.6mm, which is the size I have used for years, but the difference doesn't matter.
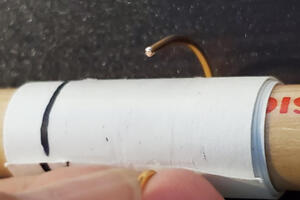
3. Roll the drumstick on the table to mark a black ring where the tapered tip of the drumstick is 13mm in diameter.
4. Roll the drumstick on the table to mark a black ring where the tapered tip of the drumstick is 14mm in diameter.
5. Note, if the drumstick handle is 14mm in diameter, mark the 14mm ring where the taper ends and the handle begins.
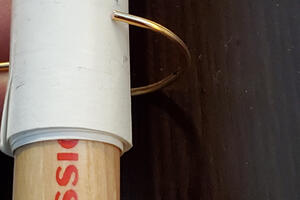
If you're going to make normal size thumb picks, continue with the following:
6. Use tape to chain both halves of the index card an inch or two from the drumstick handle end.
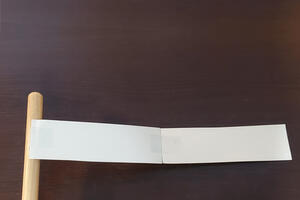
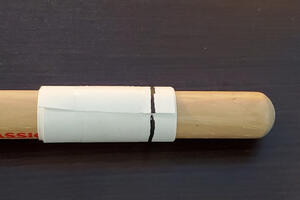
7. Roll up the card so it is snug around the drumstick and tape it so it stays. Your final diameter should be 16mm. Add or subtract length if rolling something that gives you a different value. Then roll the drumstick on the table while marking a ring on the rolled up index card near the handle end of the drumstick.
Sizing Guide
All measurements refer to the width across the knuckle at the fingertip or thumbtip.
Finger Picks:
Small size is for 15mm or less.
Normal size is for 16mm - 20mm. This size fits most adults.
Large size is for 21mm or more. For this size, substitute normal size thumb picks.
Thumb Picks:
Small size is for 16mm - 20mm.
Normal size is for 21mm or more. This size fits most adults.
Normal Size Finger Pick:
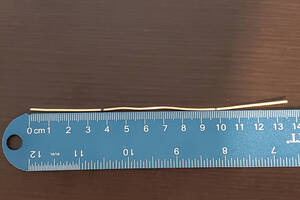
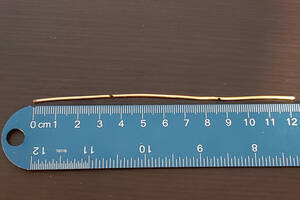
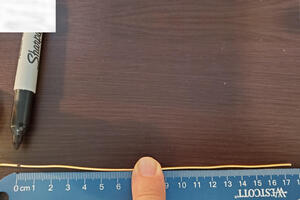
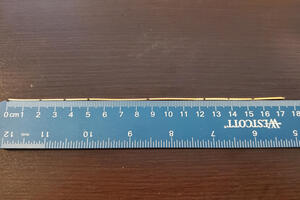
1. Measure and cut a length of wire 135 millimeters long.

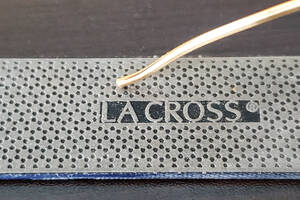
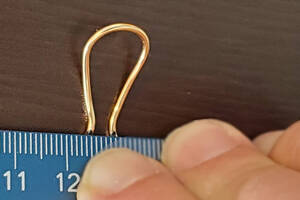
2. File the wire ends smooth to the touch. This is an inexpensive diamond nail file.
3. Mark the wire 37 millimeters from each end.
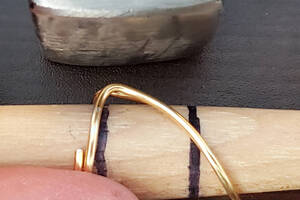
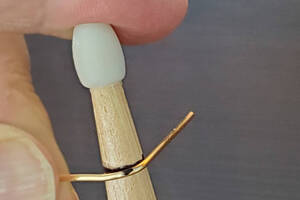
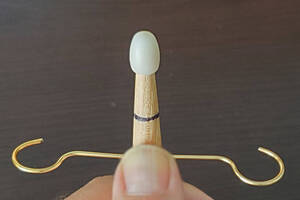
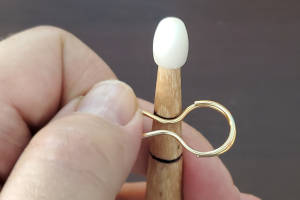
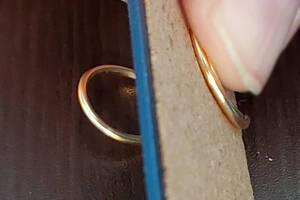
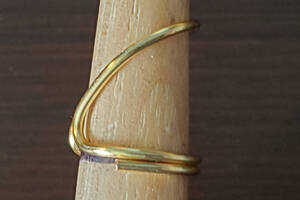
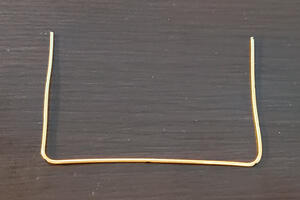
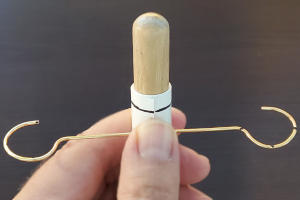
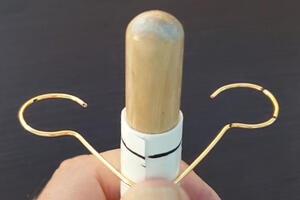
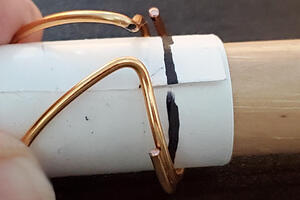
4. Bend the wire 90 degrees at each mark around the black 8mm ring of the drumstick to form a U.
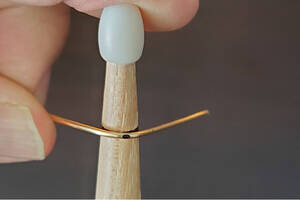
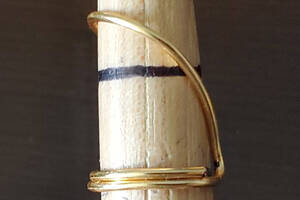
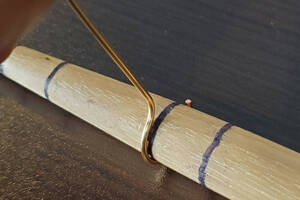
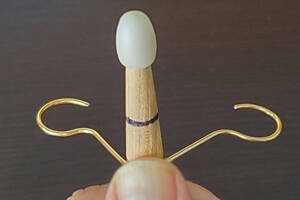
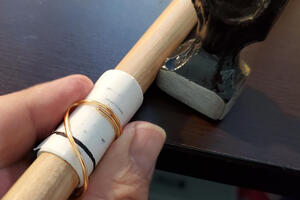
5. Hold down each wire tip with the black 14mm ring and roll the wire up and around the black 14mm ring until reaching the 90 bend.
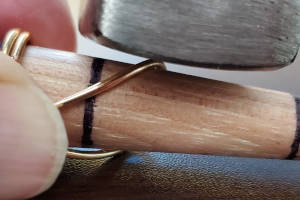
6. Gently tap each wire end down onto the drumstick at the black 14mm ring. The black wire marks should be at the centers of the 90 degree bends.
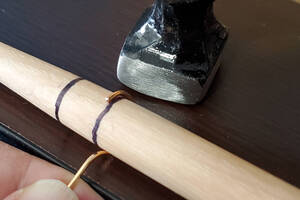
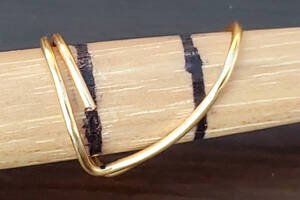
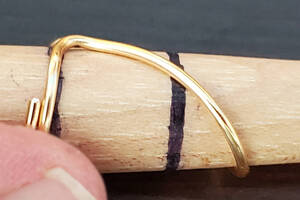
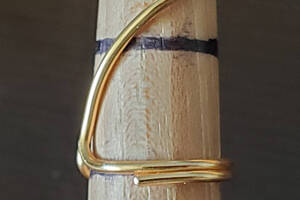
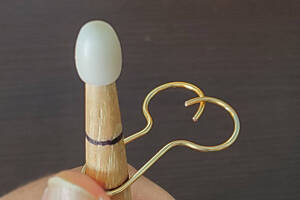
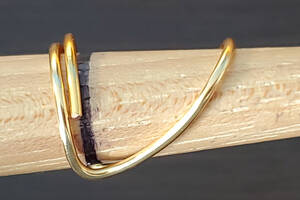
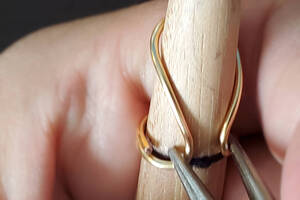
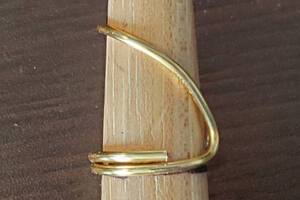
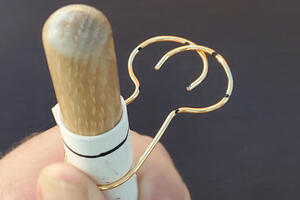
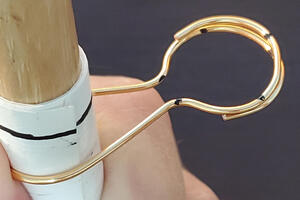
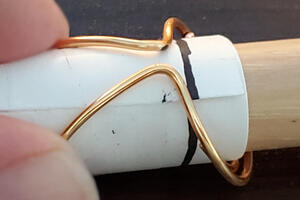
7. Bend the center of the wire around the drum stick at the black 13mm ring until the two wire rings overlap completely. Keep the right ring above the left ring so all your picks match.
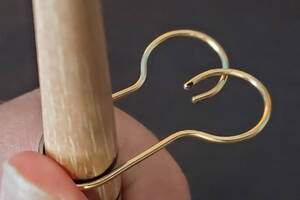
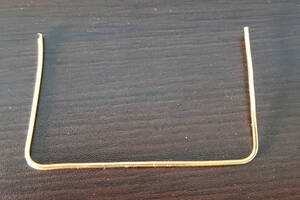
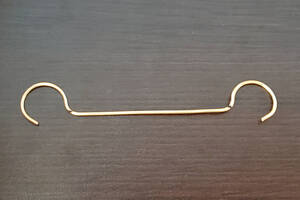
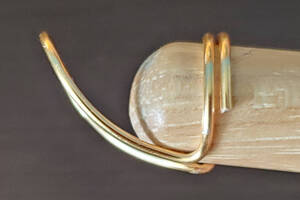
You can rework the 90 degree bends on the black 8mm ring if you need to.
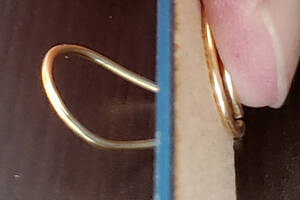
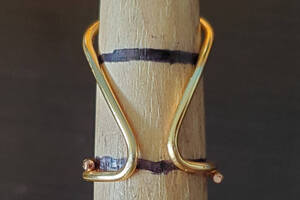
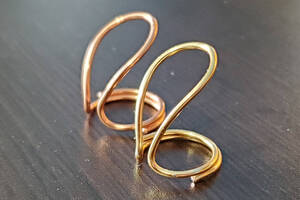
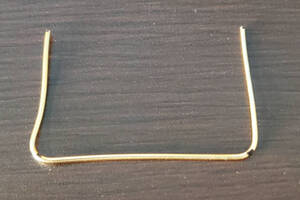
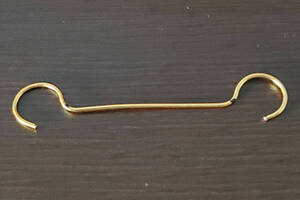
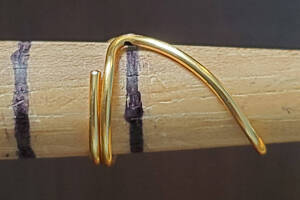
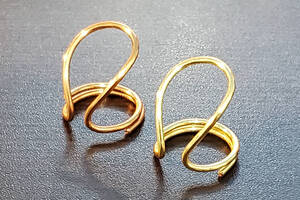
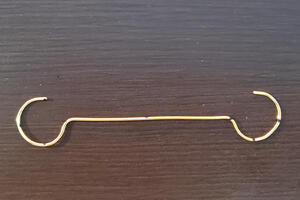
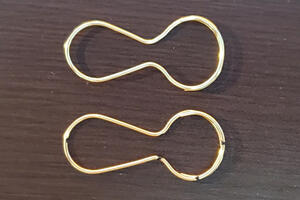
This is the shape you want to end up with.

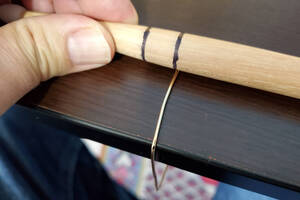
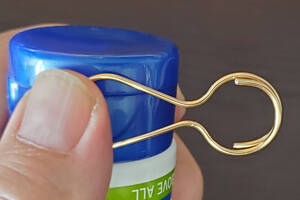
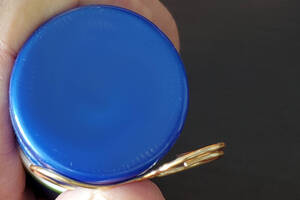
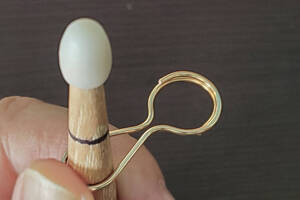
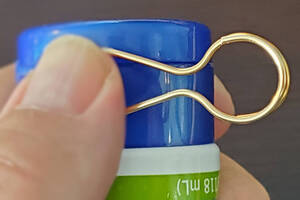
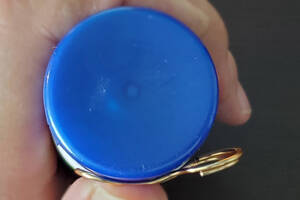
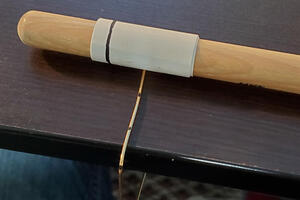
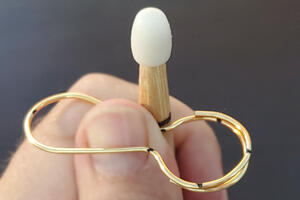
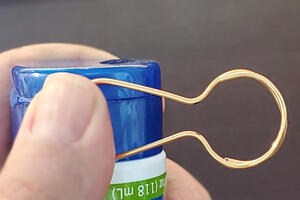
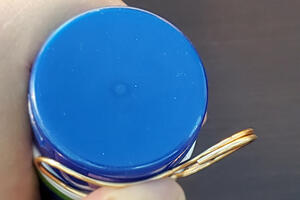
8. Bend the pick around the cyclinder from the tip to the start of the rings. This is a lotion tube cap.
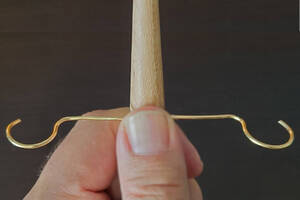
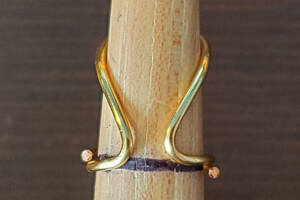
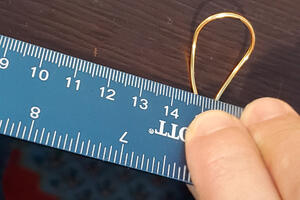
9. Put the pick on the table with the tip curving up and the rings half off the edge of the table. Put the ruler over the rings with the ruler edge touching the two black 90 degree marks dividing the rings from the rest of the pick.
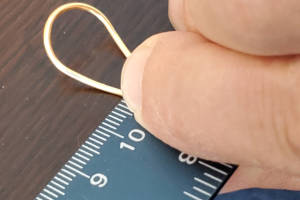
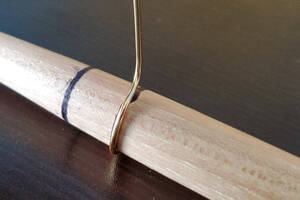
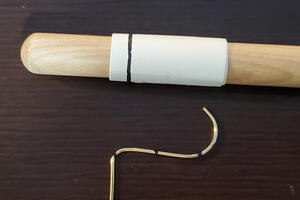
10. Hold the rings behind the ruler and bend the ruler and rings up and slightly past 90 degrees.
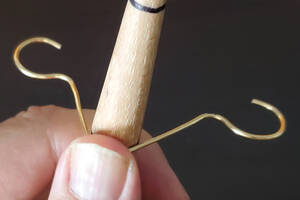
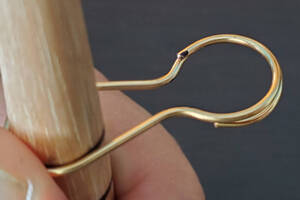
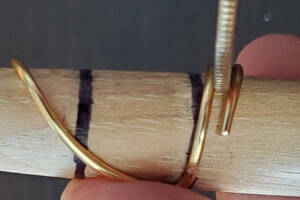
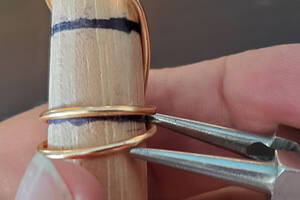
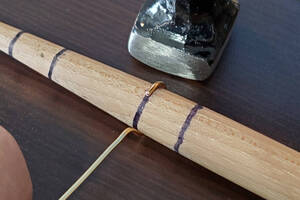
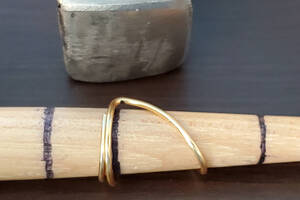
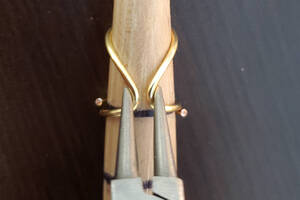
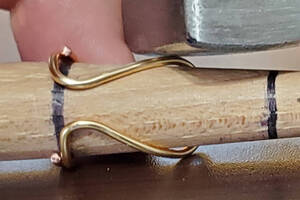
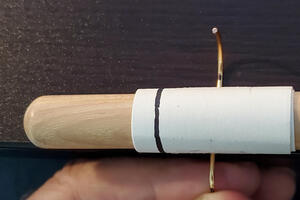
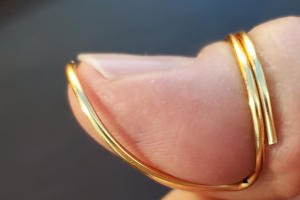
11. Push the drumstick tip up through the rings and the tip until the bend at the wire rings reaches the black 14mm ring. If the rings are not close to parallel with the black 14mm ring, start again from step 10 bending a little more this time. In the photo below, bending a little more would be better, but this is close enough.
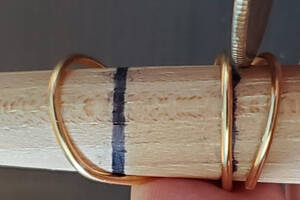
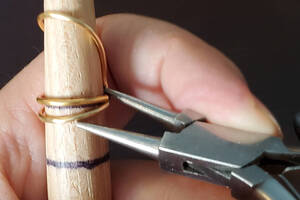
12. Use the hammer to gently tap the two bends at the rings down flat against the drumstick at the black 14mm ring.
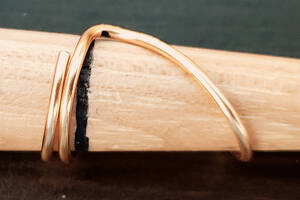
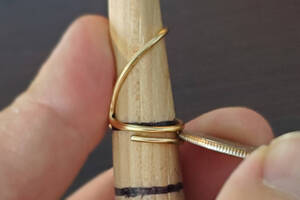
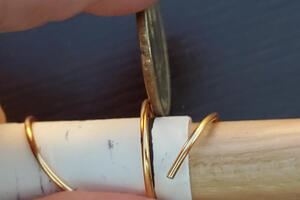
13. Use a large coin to bend the ring closest to the tip parallel to the black 14mm ring of the drumstick.
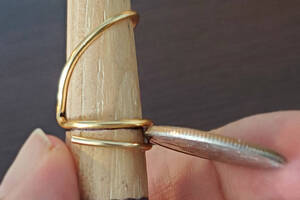
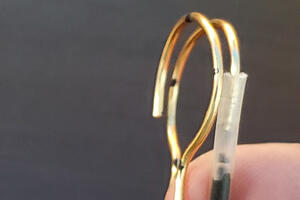
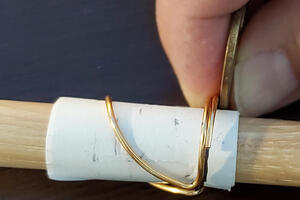
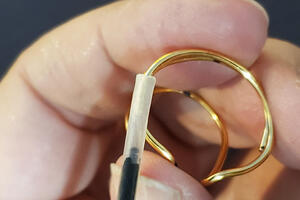
14. Use the needle nose pliers to bend the remaining ring against the first ring and so both touch the black 14mm ring around the drumstick. Use the empty end of a thin ink tube to help with any fine adjustments of the ring tips.
15. With the rings still at the black 14mm ring on the drumstick, give one or two sides of the tip a gentle tap so that they both hug the drumstick.
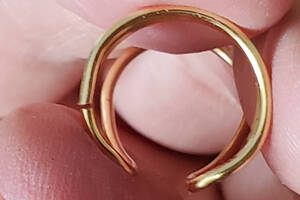
16. Put the non-tip end of the drumstick in the wire rings and hold the rings while you ream the rings out a little bit with the drum stick to make sure the rings are round and looking nice.
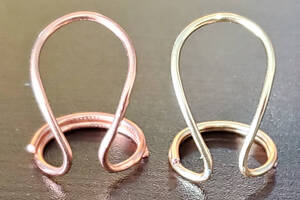
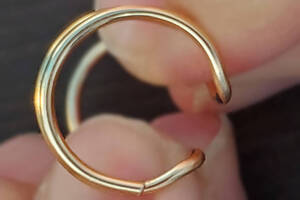
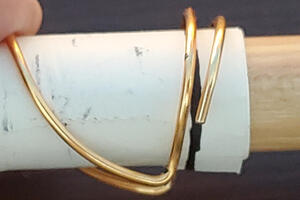
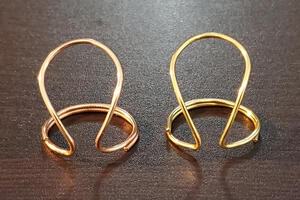
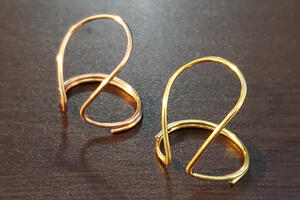
If you follow these instructions well enough, you will be able to make a pick that looks nearly identical to the picks I've made professionally. I made the copper pick on the left professionally with some more expensive tools, and I made the gold pick on the right following these home instructions. They both look very nice!
After you make as many of these as you need, you're ready to follow the fitting instructions.
Small Size Finger Pick:
1. Measure and cut a length of wire 122 millimeters long.

2. File the wire ends smooth to the touch. This is an inexpensive diamond nail file.

3. Mark the wire 35 millimeters from each end.
4. Bend the wire 90 degrees at each mark around the black 8mm ring of the drumstick to form a U.
5. Hold down each wire tip with the black 13mm ring and roll the wire up and around the black 13mm ring until reaching the 90 bend.
6. Gently tap each wire end down onto the drumstick at the black 13mm ring. The black wire marks should be at the centers of the 90 degree bends.
7. Bend the center of the wire around the drum stick at the black 10mm ring until the two wire rings overlap completely. Keep the right ring above the left ring so all your picks match.
You can rework the 90 degree bends on the black 8mm ring if you need to.
This is the shape you want to end up with.

8. Bend the pick around the cyclinder from the tip to the start of the rings. This is a lotion tube cap.
9. Put the pick on the table with the tip curving up and the rings half off the edge of the table. Put the ruler over the rings with the ruler edge touching the two black 90 degree marks dividing the rings from the rest of the pick.
10. Hold the rings behind the ruler and bend the ruler and rings up and slightly past 90 degrees.
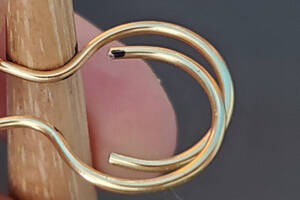
11. Push the drumstick tip up through the rings and the tip until the bend at the wire rings reaches the black 13mm ring. If the rings are not close to parallel with the black 13mm ring, start again from step 10 bending a little more this time. In the photo below, the angle of the rings matches the black 13mm ring on the drumstick just fine.
12. Use the hammer to tap the two bends at the rings down flat against the drumstick at the black 13mm ring.
13. Use the needle nose pliers to pull the two 90 bends about one wire width apart at the black 13mm ring and then release them.
14. Use a large coin to bend the ring closest to the tip parallel to the black 13mm ring of the drumstick.
15. Use the needle nose pliers to bend the remaining ring against the first ring and so both touch the black 13mm ring around the drumstick. Use the empty end of a thin ink tube to help with any fine adjustments of the ring tips.
16. With the rings still at the black 13mm ring on the drumstick, give one or two sides of the tip a gentle tap so that they both hug the drumstick.
17. If needed, adjust the rings with your fingers so they line up in a nice circle.
18. If needed, slide the rings down a little beyond the black 13mm ring to widen the circle to fit on your intended finger. (This is a fitting shortcut, now that you have a drumstick handy!)
If you follow these instructions well enough, you will be able to make a pick that looks nearly identical to the picks I've made professionally. I made the copper pick on the left professionally with some more expensive tools, and I made the gold pick on the right following these home instructions. They both look very nice!
After you make as many of these as you need, you're ready to follow the fitting instructions.
Normal Size Thumb Pick:
1. Measure and cut a length of wire 175 millimeters long.
2. File the wire ends smooth to the touch. This is an inexpensive diamond nail file.

3. Mark the wire 20, 35, and 50 millimeters from each end. Also mark the center at 87.5mm.
4. Bend the wire 90 degrees at each 50 millimeter mark around the black 8mm ring of the drumstick to form a U.
5. Hold down each wire tip with the 16mm roll on the drum stick and roll the wire up and around the 16mm roll until reaching the 20mm mark on the wire. If the very end of the wire is still straight, leave it for now.
6. Now put the 16mm roll on the 35mm mark and bend the wire up until reaching the 90 degree bend.
7. Now, continue rolling the 90 degree bend and the drumstick together further around until the 16mm roll on the drumstick is as wide as the distance between the wire tip and the 90 degree bend.
8. This is what you should have now.
9. Bend the center of the wire around the 16mm roll on the drum stick until the two wire rings overlap and become one ring. Keep the right ring above the left ring so all your picks match.
You can rework the 90 degree bends on the black 8mm ring if you need to. Use 16mm roll of the drumstick, your fingers, and the empty end of the ink tube to help yourself end up with a good looking ring.
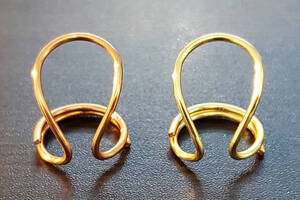
This is the shape you want to end up with. The upper shape is ideal. The lower shape is what I was able to make following these home instructions.
10. Bend the pick around the cyclinder from the tip to the start of the rings. This is a lotion tube cap.
11. Put the pick on the table with the tip curving up and the rings half off the edge of the table. Put the ruler over the rings with the ruler edge touching the two black 90 degree marks (50mm marks) dividing the rings from the rest of the pick.
12. Hold the rings behind the ruler and bend the ruler and rings up and slightly past 90 degrees.
13. Push the drumstick tip up through the rings until the thumb pick is resting on the 16mm roll. If the rings are not close to parallel with the black ring on the 16mm roll, start again from step 10 bending a little more this time. In the photo below, bending a little more would be slightly better, but this is good enough.
14. Use the hammer to gently tap the two 90 degree bends at the rings down flat against the 16mm roll on the drumstick.
15. Use a large coin to bend the ring closest to the tip parallel to the end of the 16mm roll.
16. Use the large coin to get the second ring to lay flat against the first ring. Use your fingers and the empty end of the ink tube to help make a nice ring.
17. If needed, you can position the 16mm roll off the edge of the table and use the hammer to gently tap each wire end against the 16mm roll so that each wire end is lined up with the ring.
16. You can also put the thumb pick on your own thumb as you work on it. Doing this will give you a headstart fitting it to your thumb.
If you follow these instructions well enough, you will be able to make a pick that looks good and is perfectly functional. I made the copper pick on the left professionally with some more expensive tools, and I made the gold pick on the right following these home instructions.
Small Size Thumb Pick:
The small thumb pick is actually the normal size finger pick with more wire in the ring to help hold it on the thumb.
To make a small thumb pick, follow the normal finger pick instructions with these differences:
In step 1, cut the wire 145mm.
In step 3, place the two 90 degree bend marks 42mm from each end.
Butterfly Finger Picks ® © 2012-2024. Beautiful Sound For Guitars And Other String Instruments. www.butterflyfingerpicks.com