User Tips:
Michael (Missouri, USA) has suggested two very easy ways to
adjust picks:

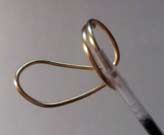
1. Take a pen apart and use the empty end of the ink tube to slip over the wire pick ends to adjust them easily without scratching the picks.
This method will open the ring to fit a larger finger, will close the ring to fit a smaller finger, and helps keep the ring looking nice.
For best results opening the ring, pry the wire ends open slightly with the tube, then pull the ring apart slightly from both sides with your fingers until the wire ends are flush again with the now larger ring. Repeat until the ring fits nicely.
For best results closing the ring, pry the wire ends closed slightly with the tube, then push the ring together slightly from both sides with your fingers until the wire ends are flush again with the now smaller ring. Repeat until the ring fits nicely.
2. Another way to open up the fingerpicks without misshaping them is to insert the nose of a wide barrel pen into the ring portion (or something similar such as the plastic tip of a turkey baster).
An alternative to the tools listed above is small needle nose pliers.
If using pliers, it's a good idea to put masking tape or cloth over the pick surface first to help avoid scratching it.
Here is as a way to stabilize a thumb pick if needed:

If you have adjusted the thumb pick properly and still have trouble keeping the pick on your thumb while playing, you can put a rubber band around the pick and your thumb just inside the ring.
Doing this helps hold the pick from sliding off your thumb yet allows the rubber band to remain clear of your instrument strings.
Be sure the rubber band is loose enough to remain comfortable and not obstruct circulation in your thumb, but firm enough to keep the pick from slipping forward.
Here is an easy way to match picks to fingers:
Stand the picks up side by side on a flat surface with the rings down and compare ring sizes.
Put the pick with the smallest ring on your ring finger.
Then put the pick with the largest ring on your middle finger.
Then put the remaining pick on your index finger.
After a few times you can do this fairly instantly while putting them on.
Al (Tennesse, USA) has suggested two easy ways to
match picks to fingers:

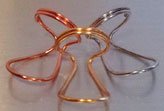
1. Purchase a set with a different finish for each finger. This helps in quick identification of which pick is adjusted for which finger.
2. Mark each pick for quick finger reference. I used acrylic artist paints, straight from the tubes and a small detail brush; but using a toothpick, dipping it into the tube and marking...works well, too.
I marked the finger ring portion of each with a narrow band; red for the index finger, blue for the middle finger, and green for the ring finger.
After the acrylic dries, which only takes 5 to 10 minutes, the acrylic is tough and durable under normal circumstances.
Glenn (Florida, USA) has suggested an easy way to match picks to fingers:
I simply went to a dollar store/pharmacy and bought one of those Monday to Sunday vitamin/pill holders.
My first finger pick is in the Monday section, 2nd is Tuesday, 3rd in Wednesday.
This not only keeps them separated, but also gives them great protection from being crushed.
The other days could be used for another set of picks or for regular picks.
George (Fulda, Germany) has suggested an easy way to match picks to fingers:
Simply remove a mm or two of insulation from a bit of electronic wire and feed it onto the picks until it rests in the corner of the picking-bow.
Do each one a different color, and all you have to do is to remember which goes on which finger.
String Noise and Coating

If your thumb pick causes a lot of string noise, particularly with your low E string, you should switch to using at least a coated thumb pick.
Most guitars don't need coated picks.
Until you purchase a coated thumb pick, you can temporarily coat your existing thumb pick playing surface with fingernail hardener.
When the hardener dries, it will last for about an hour's worth of continuous playing before wearing through to the metal pick.
The Butterfly Pick coating purchased from this website is put on the picks while they're being made and lasts indefinitely.
The image here is a set of coated picks. The coating is on the playing surfaces (right side).
Strumming
It is possible to strum with Butterfly Finger Picks.
Use the thumb pick to strum down and one of your finger picks to strum up.
Finger picks cannot strum as aggressively as flat picks, but you can get a lot of sound with even light pressure from your picks.
If you need extra support, you can use your thumb to support your strumming finger pick or a finger to support your strumming thumb pick.
Bob (California, USA) has suggested a way to
strum in both directions.
Wrap surgical tape around the pick on a finger to hold it with the pick tip right under the nail line.
In this way, you can strum in both directions without the pick coming loose.
Surgical tape even comes in skin colors which help the tape blend in with your fingers.
Butterfly Finger Picks ® © 2012-2025.
Beautiful Sound For Guitars And Other String Instruments.
www.butterflyfingerpicks.com


